

Behind the Mic: My Audiobook Narration Workflow From Script to Final Master (and beyond)
- C J
- Apr 30
- 8 min read
After this latest narration of "Dylan Stone's Journal" by W.D. Nelson (my 23rd audiobook production), I wanted to document my process for anyone interested in how (according to one narrator at least) goes about producing an audiobook. My purpose is twofold. 1) Help those that are curious about how the process works and what's involved. 2) Provide ample evidence that producing an audiobook is far beyond just plopping down next to a microphone and just read the book. There is real value behind the production.
Note: Some may find the detail in this post to be extensive. I thought about condensing it, but I think there is value in the details. Grab a hot beverage of choice to sip along the way. I think you may find items of value in my process.
Before diving into the step‑by‑step workflow, here’s the gear and software that make the production possible.
The Tools
Audio chain (Hardware used end-to-end to capture clean, consistent audio.)
Sound dampened portable 3'x 3' vocal booth
Neumann TLM-103 microphone
'Pop' filter for microphone
Universal Audio Apollo Twin X audio interface
Sony MDR-7506 headphones
Yamaha studio monitors
Other Hardware
HP Omen PC w/large widescreen curved monitor
Apple iPad
Software (Tools to handle recording, editing, cleanup, and final mastering)
Reaper DAW (Digital Audio Workstation)
Various preamp and effects plugins by Universal Audio and Izotope
Davinci Resolve Video / Audio editor
Author Meet & Greet
I always try to offer to meet with the author via Google Meet or another platform. I like these as I get to communicate my excitement and desire to meet their goals, and I get to hear some of their vision. It really is a win-win item.
I offer a project specific 'Onboarding' welcome document shared on Google Drive that contains details of my process, expectations, estimated timelines, request for character descriptions, book tone and pace thoughts, and a glossary of unique words or names with phonetic or 'sounds-like' descriptions.
Step 1 - Quick Manuscript Review
Usually even before I accept a contract I ask for the manuscript. With this in-hand I can do many things I could not do before:
Determine the true length from a narration perspective, minus sections not typically read such as the table of contents, acknowledgements, reader reviews, etc.
Do a quick scan to see if there are any obvious signs of an AI 'written' book. This can be a significant red flag for me.
Scan the manuscript for overall layout. I check for things that may change or complicate the narration flow such as many bulleted or numbered lists, descriptions of diagrams and illustrations, and text in languages I am not familiar with. These can all add to the runtime of the book and also require discussions with the author to strategize.
Be on the lookout for grammatical, spelling, and formatting errors. If the manuscript is not very 'clean' it will add to the complexity and will most likely lead to pauses in the production while the author 'fixes' their work. You should start with a well edited final piece of work.
Step 2 - Full Read of the Manuscript
Now we have a contract and have communicated our terms and our revised estimate of production length, accounting for the findings in Step1.
Read the book. This is an interesting one for me. When I read it I read it typically at about 1.5 - 2x the speed I would read a book for study or entertainment. I find I can pull most all I need from this run through. Do I understand all the details at this point, no. But I do catch most of the essence of the book, the themes, the characters, etc.
Develop a list of characters (if the book has more than a narrator voice). Match this list with the one the author gives you (if you have requested one). Clarify any differences and get their input on how they hear these characters. At this point I start thinking about what attributes each voice will have, at least initially. I also consider any desired accents needed. Time to research and practice before getting in front of the mic.
Come to an agreement with the author on which book sections to voice and which ones to leave out. Don't assume either miss something, or voice sections that will not be needed in the final production.
With the manuscript understood and character decisions aligned, it’s finally time to step into the booth!
Step 3 - Step into the booth (create the 'First 15-Minute Checkpoint')
It's time to start recording! Please realize that at this point many things have transpired to allow us to begin. We need to warm up our voice, adjust levels, make sure all things are quiet around us, and that we have a good idea of the tone and pace we want to achieve.
As far as my recording method, there are typically two main ways to go about it. One is to use a clicking device to make a visible mark in the recording I can later see (a visual 'spike') when I edit the audio. When I make a mistake I make a 'click', then do another take until I get it just right. The second method is to set the recording software so that when I make a mistake I stop the recording, reset the cursor and basically go over the error with another take. I use the 'clicker' method because it is just quicker for me in the booth, plus I do not have to mess with the computer while tracking the narration. It takes me longer to edit later, but it still tends to go pretty quick.
I start at the book's opening, then press ahead and end at the end of the chapter where I am close to roughly 15 finished minutes. I do not go further at this point because if the author wants something foundationally changed such as the pace or tone (or a certain character voice) I will need to redo even more later. Note: I usually make sure I voice any main characters that may appear later in the book with a sample attached to the first 15 minutes. This way I can get sign-off on as much as possible.
Edit the 15 minutes to remove extra breaths, clicks and other unwanted noises. This also is a proofing step to make sure I did not add, remove, or translate words incorrectly. It is amazing what my brain will do as I am reading. When you are narrating, your mouth is a couple, or sometimes several words behind your brain. You are reading ahead and subconsciously adjusting for tone and pronunciation. Sometimes the mind puts a word in or removes one because that seems like what it thinks should be there. When I am editing / proofing I catch these errors and go back in the booth to correct them.
Get author approval. I mention in my onboarding document and also the discussion when I deliver the first 15 that this is a critical milestone. They really need to communicate anything that is incorrect or nags at them NOW. I explain that neither of us want to cringe later every time we hear a certain part that always bugged us. Let's fix it now!
Step 4 - Narrate and produce rest of the book
This is the longest part of the process. This is not the sprint but the marathon. And just like a marathon I need to pace myself. It is work, so I treat it like a job. I show up ready to go each recording day with many of the same rituals, explained below.
Technical Prep
I make sure technically all things are ready to go. Do I have a dedicated folder and project created. Are my levels and all software set with my presets? Do I have a plan to regularly back up all the files? Do I have adequate disk space? Did I record a short piece to double check all is okay? Can I hear myself well in the headphones? My personal choice is to upload the finished audio chapter by chapter as I complete it for the author to follow my progress and communicate any errors. I know some narrators like to just deliver the whole production in one chunk, but I make it clear up from that other than mistakes I will not be doing a wholesale re-record due to their change of mind or vision (referring back to the agreed upon first 15 minute approval)
Rituals
The rituals. For me this means a strong cup of coffee, warming up my voice, and starting at just about the same time of day. 10:00am works best for me. By doing this I can pretty much keep each days' recording consistent with the previous day. I press record. I load up the book on the iPad, turn on the LED strip lights in the booth, and I am off!
Recording
I usually record about 1-2 chapters a day, five days a week. This is usually about 1 1/2-2 hours in the booth. If I do anything on the weekends it is usually just fixes and/or editing.
Editing / Proofing
Edit and proof. After recording each day I then put in some time to edit what I recorded. As I go through I make sure I not only monitor pacing and pronunciation, but also make sure I am matching the text word for word. The only place I may drift from this rule is when I sometimes will use a contraction (e.g. It is becomes It's) when a character is speaking to sound more natural, or there is an obvious mistaken word or punctuation. I do make sure though that I communicate any of these changes to the author.
Mastering
Finalize the audio. This last step before delivering the audio is critical. This is where the final 'polish' is applied, and audio/file criteria met. I have a 'chain' of software plugins to treat the audio to attain consistency, clarity, and quality. I use:
Compression - To keep levels of loud or soft passages balanced so you do not need to keep turning it down or up.
EQ - Any recording space or voice can use some tweaking to resolve any frequencies that may be lacking or are too pronounced.
'De-Ess' - This removes the overly sibilant ('shh' or 'sss' sounds).
Mouth noise filter - Interesting one. With these high end microphones you can hear ants walking nearby. Okay... maybe that is an exaggeration, but not by much. It is amazing what sounds a mouth can make at times with clicking, smacking, little pops and such. That happen just often enough that you want to remove them to not possibly distract the listener.
Render the audio (create the files) and deliver (upload). This is the last step to get the files to the platform that will be publishing the book.
Step 5 - Wrapping It Up
At this point I usually re-record the opening title and the and closing of the book, along with checking what the author wants to use as their 'Retail Sample'. This is a 1-5 minute sample from the book (usually starting at the Introduction and/or Chapter 1). I then deliver those files.
Get the author or publisher approval. This is the final approval before settling payment and/or publishing. This is a big step! A lot happened to get to this point for both of us.
Settle any payment due. If a pay-for-production deal (no royalties) I make sure I receive payment before ticking off approval for publishing by the distributor.
All book audio is validated and prepared by the distributer. This can take several days. For Audible (ACX) this is currently 10 working days.
Step 6 - Next Steps
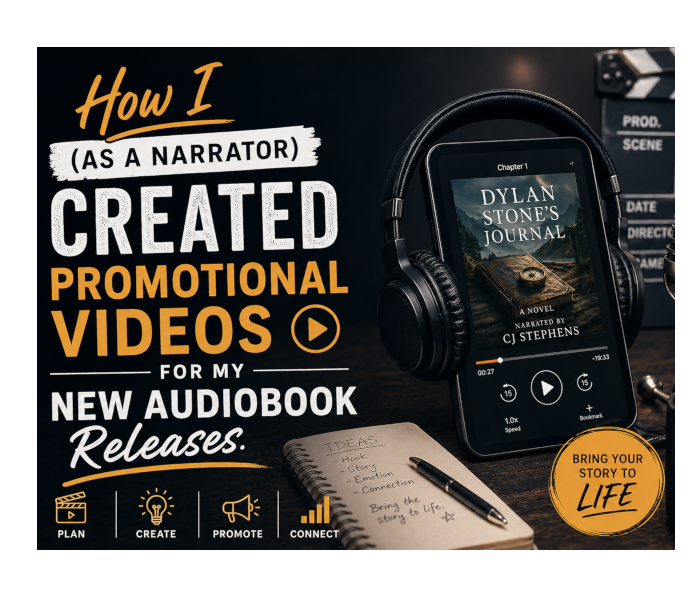
I communicate with the author to explore how I may help promote the new audiobook. For me this has meant sometimes producing a new release promotional video short distributed on YouTube, LinkedIn, Facebook, Instagram, TikTok, etc. You can check out how I do this and its potential value here.
I add a sample of the new audiobook to my website, along with a link to purchase the book if desired.
I add the new book to my profile at LinkedIn and any sites where I book narration projects (ACX, Author's Republic, Upwork, etc.)
I audition for new books and maintain my calendar.
I listen to other audiobooks, watch tutorials on character or accent development.
Audiobook production is a craft that evolves with every project, and I’m always learning, refining, and improving.
Producing an audiobook is a blend of performance, engineering, collaboration, and discipline. This workflow has evolved over 23 productions, and it continues to grow with each new project.
If you’re an author interested in bringing your book to life, I’d love to talk about your project.
If you are an audiobook narrator, let's connect and share strategies and tips at cj@CJStephensCreative.com

Comments